Calibrate and Set Pixhawk 2.4.8
-
Pixhawk 2.4.8 requires Mission Planner to calibrate and setup, QGroundControl is not recommended. Connect Pixhawk with computer to calibrate and battery are not required if not specified.
1. Install Mission Planner Go to its official website https://ardupilot.org/planner to download and install it on your computer.
2. Connect Pixhawk board with computer by a micro USB data cable
3. Open Mission Planner to connect and calibrate
Note: There are instructions of each step in Mission Planner, and please refer to videos if you need detailed operating guide.
-
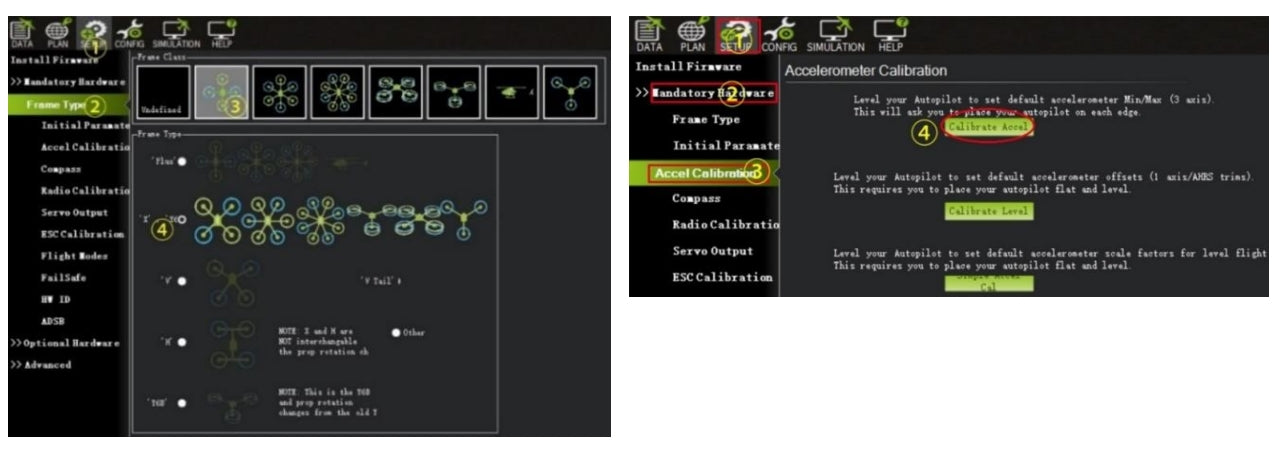
a. Select frame type b. Calibrate accel
-
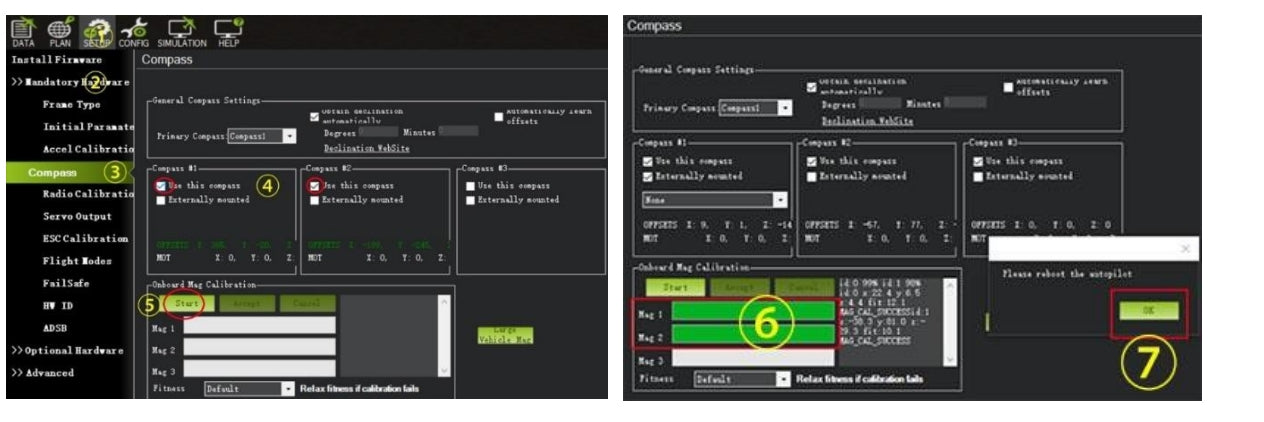
c. Calibrate compass
-
-
d. Calibrate radio
-
-
Note: Only Pitch (Ch 2) requires to be reversed.
-
e. Set flight modes
-
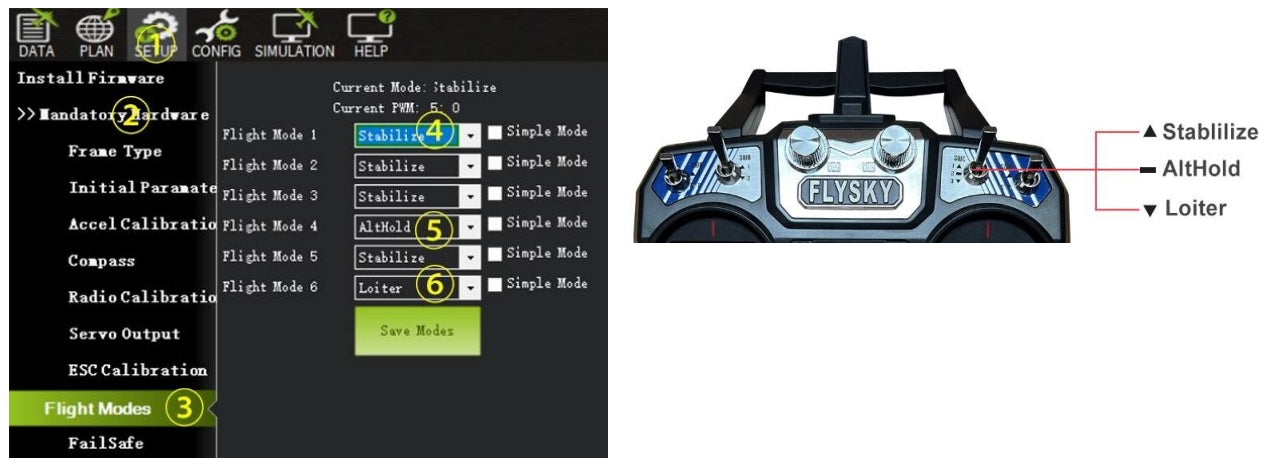
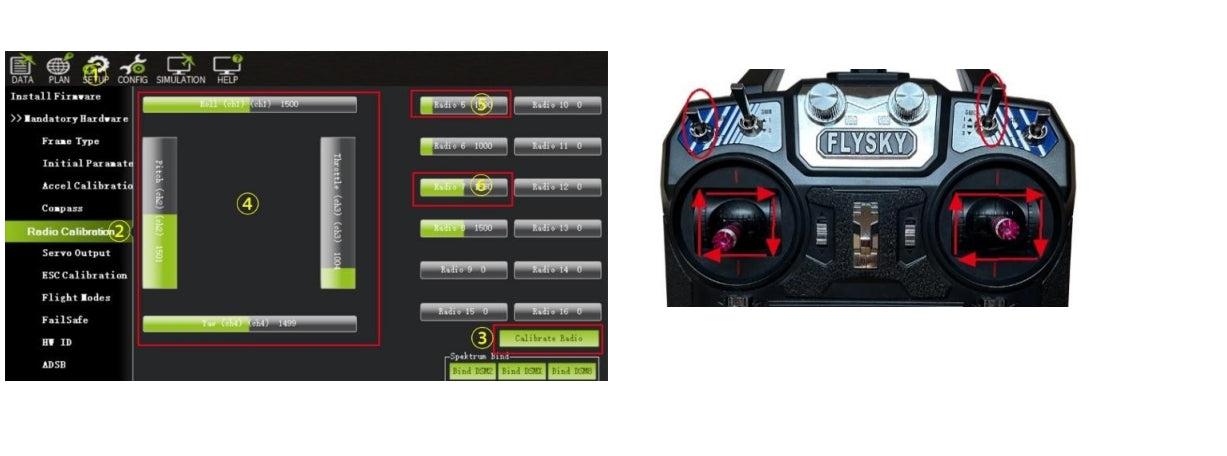
f. Set fail safe g. Set CH 7 RTL
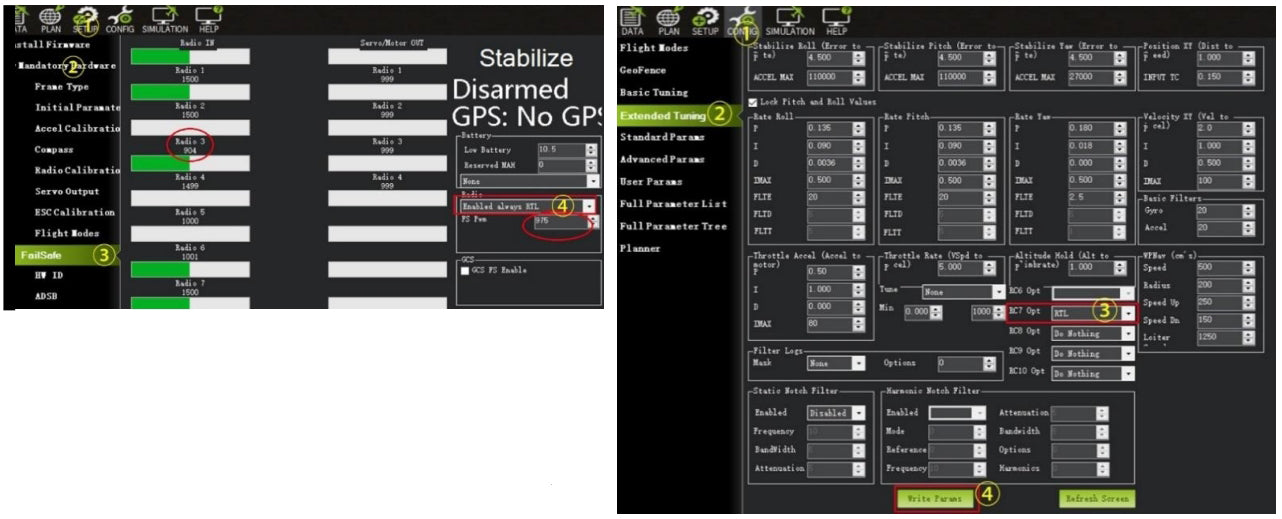
-
Note.
Turn off transmitter to check if radio 3 value<975. It means RTL will start when signal lost. -
4 Test motors (Plug in the battery)
a. Check all the signal wires of ESC plug into Pixhawk right.
b. Check the direction of motor rotation (#1 & 2 CCW, #3 & 4 CW)
-
Video - Calibrate Pixhawk flight controller - Part 1
Video - Calibrate Pixhawk flight controller - Part2
-
5 Calibrate ESCs (Insert and remove the battery as follows)
a. Turn on transmitter - Push throttle to top - Plug in drone battery and wait for Pixhawk to reboot
b. Unplug battery - plug in battery and wait for Pixhawk to reboot
c. Press and hold the safety switch for 2 seconds – ESCs make 1 long sound - Pull throttle to bottom - ESCs
makes 2 short and 1 long sound (or a piece of music) - ESC calibration complete -